
How to set up a blog with Eleventy
Eleventy is my favorite static site generator, and it's the tool I use to build this blog. In my opinion, it strikes the perfect balance between minimal and flexible, enabling you to create a blog that works like you think. This is the post I wish I had when I was learning how to use it.
Prerequisites
This tutorial is aimed at people who are comfortable using a text editor and command line. Before we get started, you'll want to make sure you've done a few things:
- Install
npm. If you don't have it, you can get it by installing Node. - Sign up for a GitHub account. GitHub will be part of the build process for publishing your site.
- We'll also be using Git during this build process. If you're not comfortable using it via the command line, you can use a tool like GitHub Desktop.
Creating your Eleventy blog
Your Eleventy blog will live in a folder on your computer. Create a folder for it (you could name it blog or www or my-blog-name or whatever you'd like) and open it in your text editor.
Point your command line to this directory. (If you don't know how to use the command line, I recommend using VS Code as your text editor and following the side tutorial below.)
Using VS Code's terminal
Open your blog's folder in VS Code, then choose any of the following options to open the integrated terminal.
- Go to Terminal > New Terminal in the Mac menu bar.
- Press
Control+`(the key belowEsc). - Press
⌘+Shift+Pand type "Toggle Integrated Terminal", then hitEnter.
- Run the following command:
npm init -y - And then this one:
This installs Eleventy to your computer. It might take a few minutes to complete.npm install --save-dev @11ty/eleventy
Create a basic layout
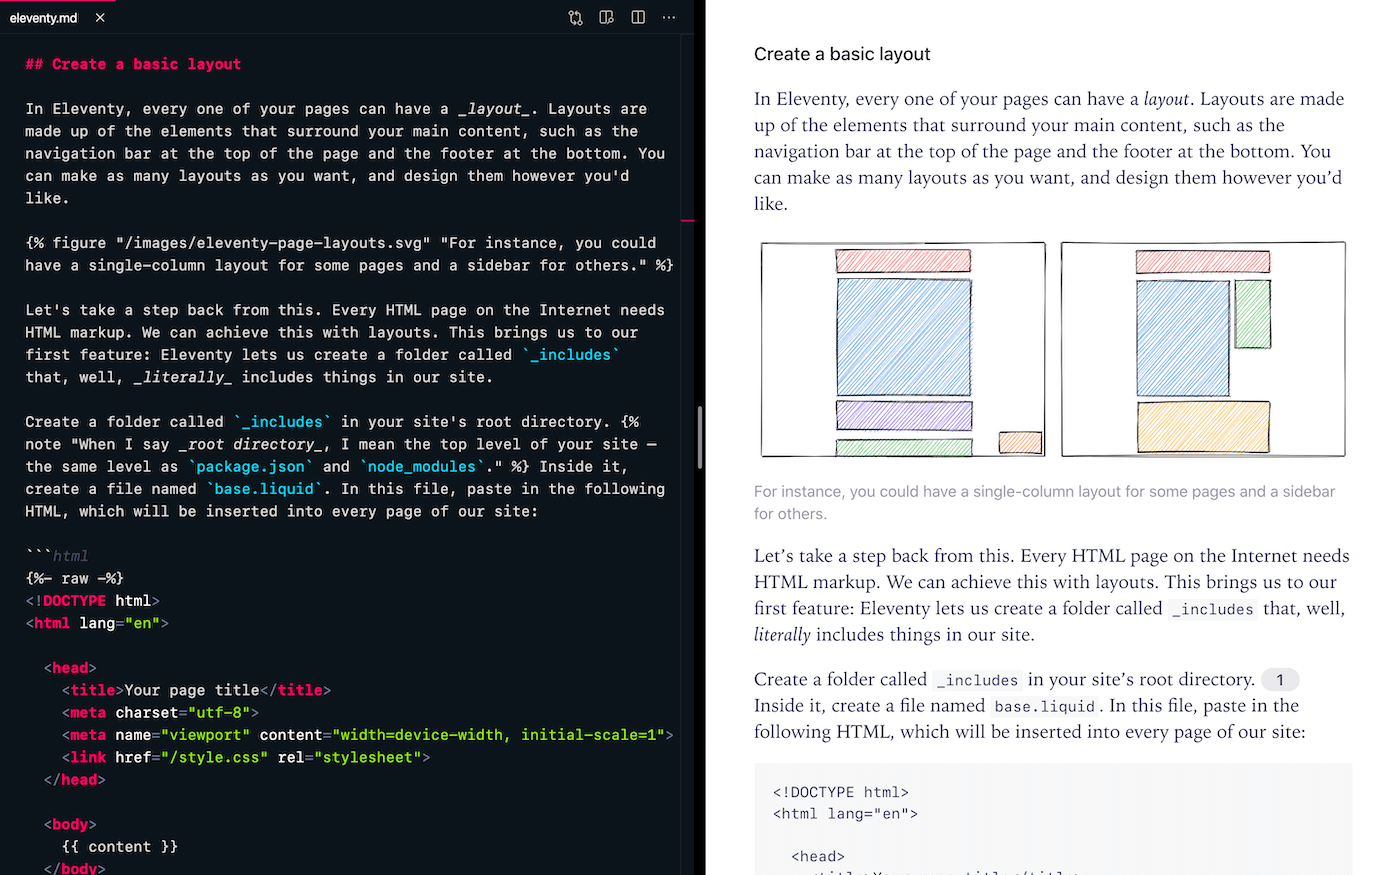
In Eleventy, every one of your pages can have a layout. Layouts are made up of the elements that surround your main content, such as the navigation bar at the top of the page and the footer at the bottom. You can make as many layouts as you want, and design them however you'd like.

The very first layout you should make is a base HTML layout — that is, a layout to add <head> and <body> tags to your site. To do this, create a folder called _includes in your site's root directory. (When I say root directory, I mean the top level of your site – the same level as package.json and node_modules.) Inside it, create a file named base.liquid. In this file, paste in the following HTML, which will be inserted into every page of our site:
<!DOCTYPE html>
<html lang="en">

  <head>
    <title>Your page title</title>
    <meta charset="utf-8">
    <meta name="viewport" content="width=device-width, initial-scale=1">
    <link href="/styles.css" rel="stylesheet">
  </head>

  <body>
    {{ content }}
  </body>

</html>
Now, your folder structure should look something like this:
yoursite/
  _includes/
    base.liquid     # contains the HTML from above
  node_modules/     # ignore this
  package-lock.json # ignore this
  package.json      # ignore this
The _includes folder is special: Eleventy looks there to literally include parts of your site, such as your page layouts. We'll use _includes more in a few minutes.
Create your homepage
Alright, now we're getting somewhere! Back in your site's root directory (next to node_modules, package.json, etc.), create a file called index.md. (Index is a popular word in web development. When placed in a root directory of a website, it is understood to be a site's homepage.) Inside it, paste this text:
---
layout: base.liquid
---

# Welcome to my site!

Not to brag, but it's pretty great.
Start your server
It's time to preview your work so far. To spin up a local server, run this in your terminal:
npx @11ty/eleventy --serve
This will return an output like this:
[Browsersync] Access URLs:
 --------------------------------------
       Local: http://localhost:8080
    External: 🐈
 --------------------------------------
          UI: http://localhost:3001
 UI External: http://localhost:3001
 --------------------------------------
[Browsersync] Serving files from: _site
You've just spun up a local server for your Eleventy blog! You can access it at the Local URL given in the terminal, which will usually be localhost:8080. To stop the server at any time, you can click into the terminal and press Control + C.
Now, what's with that 🐈 emoji? In your terminal, that'll be a URL. That's actually a preview that can be accessed from your local network. In other words, you can type it into your phone to view a mobile preview of your blog while you're developing it. (If you can't access your site at this URL, your firewall settings might be blocking the connection. Don't worry if you can't access it; it's more of a cool feature. It's not required to develop your blog.)
Live preview
Arrange your screen so VS Code is on the left and your browser is on the right. Edit your homepage to say something different, and then save your file with ⌘ + S. You'll see that the page refreshes to show you your changes automatically. This is called "hot reloading", and it's really nice to have when you're working on a post!
If you're able to visit your blog from the 🐈 URL above, open your homepage on your phone and then edit it in VS Code. What happens on your phone when you save the file?
Add your first post
Things are starting to take shape! You have a basic layout and some HTML. Now, it's time to write your first post.
Create a posts folder in the top level of your site. Inside it, create a file called kitten.md. Your folder structure should now look like this:
yoursite/
  _includes/
    base.liquid
  node_modules/
  posts/            # new!
    kitten.md       # new!
  package.json
  package-lock.json
  index.md
Inside your new kitten.md file, let's write our first post:
---
title: This is my first post
date: 2020-01-30
---

Meow in empty room. Stare at invisible bug on ceiling. Stand
in doorway, unwilling to choose whether to go in or out.
Stretch and yawn. Go back to sleep.

Ooo, feather! Moving feather! Run at 3 AM. Run at 6 AM.
Sleep during day. Mesmerizing birbs. Kick up litter.
Show belly.
We're not done yet — we still need to set the layout. But first, if you'll notice, we give the post a title inside the frontmatter. You could make up some of your own properties too:
Custom frontmatter
You aren't limited to only having a title. You can add whatever you'd like to your frontmatter:
---
title: This is my first post
date: 2020-01-30
mySpecialNote: This is a note!
showCatPicture: true
---

Meow in empty room...
Then, inside your layout files (like base.liquid), you can access them like this:
<h1>{{ title }}</h1>

<div>{{ mySpecialNote }}</div>

{% if showCatPicture %}
  <img src="cat.png" alt="A cat">
{% endif %}
In practice, I've seen these used for toggling different calls to action, setting themes, showing or hiding social sharing links, setting descriptions, working with sitemaps, and so on.
Remember what I said about adding a layout earlier? You could technically add it to your frontmatter like this:
---
title: This is my first post
date: 2020-01-30
layout: base.liquid
---

Meow in empty room...
But it would be annoying to remember to type that on every post. This is a great time to introduce another feature of Eleventy: folder-specific defaults. I think of it like this:
Any time a file is in [folder x], give it this default frontmatter.
Inside the posts folder, create another file called posts.json. Inside of this file, let's assign a default layout, permalink structure, and tags:
{
  "layout": "base.liquid",
  "permalink": "{{ page.fileSlug }}/",
  "tags": ["posts"],
}
This sets the defaults of every file in the posts folder. This helps us keep our frontmatter small and easy to work with. If you're curious, here's what each of the items is doing:
layoutis setting our layout to our HTML base from earlier. If you make another layout, such as post.liquid, you could change it to that.permalinkis making our post URLs simpler and cleaner. Before adding this defaults file, a post inside posts/kitten.md would make it accessible at example.com/posts/kitten/. Thepermalinkcode above removespostsfrom the URL path, so you get a much cleaner URL like example.com/kitten/.tagsmarks every file in this folder as apost. This'll come in handy for generating our post feed later.
Remember that these are defaults, which means that you can override them anytime from the file itself. For example, if you wanted to give kitten.md a different permalink, you could set it in its frontmatter.
Now, navigate to localhost:8080/kitten/, where you can see your post in its full glory.
Add some surrounding content
We've done a lot of work, but our site is still pretty barren. Let's start adding some more elements to the page. We'll start with a navigation menu.
Let's go back to the _includes folder, which if you'll remember, lets us include things on our site. Create a new file called nav.liquid, and paste in the following content.
<nav>
  <a href="/">Home</a>
  <a href="/kitten/">Kitten</a>
</nav>
Now, re-open base.liquid. Above {{ content }}, add this to include nav.liquid at the top of every page:
{% include nav.liquid %}
Try following the same process to add a footer to your site, and then continue onto the next section.
Add your post feed
Eleventy also gives us access to collections, which we can loop through to generate a post feed. Remember our posts.json defaults file from earlier? Inside it, we assigned a posts tag to every post. We can rely on this to generate a post feed.
Let's add some Liquid to our homepage, index.md:
{% for post in collections.posts reversed %}
  <a href="{{ post.url }}">
    <h2>{{ post.data.title }}</h2>
    <time>{{ post.data.date | date: "%B %d, %Y" }}</time>
  </a>
{% endfor %}
Inside of this loop, we can access the post's frontmatter inside of a data object. For instance, to get our post's title, we can say post.data.title. To get the date, we can say post.data.date. We also apply a filter to the date to make it more readable.
Now, we have a list of every post on our site!
Add styling
Our site is getting there, but it could use a fresh coat of paint. Let's start adding some CSS. I recommend creating a new folder inside _includes called styles. Inside this new styles folder, you can create a few CSS files.
Create variables.css:
:root {
  --font-size: 18px;
  --line-height: 1.5;
  --heading-font: 'Avenir', -apple-system, BlinkMacSystemFont, 'Segoe UI', Roboto, Oxygen, Ubuntu, Cantarell, 'Open Sans', 'Helvetica Neue', sans-serif;
  --body-font: 'Iowan Old Style', Garamond, Georgia, serif;

  --heading-color: #000;
  --body-color: #3d3d3d;
}
Create reset.css:
* {
  margin: 0;
  padding: 0;
  box-sizing: border-box;
  -webkit-font-smoothing: antialiased;
  -moz-osx-font-smoothing: grayscale;
  text-rendering: optimizelegibility;
}

html {
  font-family: var(--body-font);
  font-size: var(--font-size);
  line-height: var(--line-height);
  color: var(--body-color);
}

img {
  max-width: 100%;
  display: block;
}
Create typography.css:
h1,
h2,
h3,
h4,
h5,
h6 {
  font-family: var(--heading-font);
  color: var(--heading-color);
  font-weight: 700;
}

h1 { font-size: 2rem; }
h2 { font-size: 1.75rem; }
h3 { font-size: 1.5rem; }
h4 { font-size: 1.25rem; }
h5 { font-size: 1rem; }
h6 { font-size: 0.8rem; }

p, li {
  margin: 1rem 0;
}
To add these styles to your Eleventy site, you'll want to create a styles.liquid file in your root directory and include your CSS:
---
permalink: styles.css
layout: null
---

{% include styles/variables.css %}
{% include styles/reset.css %}
{% include styles/typography.css %}
Add shortcodes
Note: This feature is a bit more advanced. It's not required, so if you don't want to use it, you can skip over this section.
One of my favorite Eleventy features is the ability to add shortcodes. They're a slightly more advanced feature, but they're very powerful! Shortcodes let you create custom, reusable HTML elements that you can embed inside your pages and posts with syntax like:
{% example "..." %}
Here's how you'd create one that adds an <a> tag (a hyperlink) with a class called related that you can style with CSS. First, create a file called .eleventy.js in the root directory of your site. (The name of this file starts with a period.) Inside this file, add this:
module.exports = function (eleventy) {

  // Add related posts
  eleventy.addLiquidShortcode("related", (title, url) => `
    <a href="${url}" class="related">${title}</a>
  `);

};
This will let you use a new shortcode called related in your posts and templates. You'd add it to a post like this:
{% related 'Your post title' '/path-to-your-post' %}
...and it would output:
<a href="/path-to-your-post" class="related">Your post title</a>
Publish your site
Eleventy-generated websites are static, which makes them much easier and cheaper to host than WordPress, Squarespace, Rails, etc. I recommend using a service like Netlify or Vercel to host your site for free. (Hosting a static blog costs so little that most companies write it off as a marketing expense.) I've found Netlify to be a bit easier to use for complete beginners, but Vercel has a beautiful design and slightly faster speeds. You really can't go wrong with either.
Before you publish your site for the first time, you'll want to do a little bit of prep work. First, create a file called .gitignore in your site's root directory. Add this to the file:
node_modules
.DS_Store
_site
If your server is still running, press Control + C to cancel it. Then, type git init and press Enter. If your terminal displays a message that the git couldn't be found, you'll need to install Git:
How to install Git
If your terminal displays a message that Git isn't a command, run:
/bin/bash -c "$(curl -fsSL https://raw.githubusercontent.com/Homebrew/install/master/install.sh)
Then, run:
brew install git
After that, you can run the git init command from above. This will initialize a Git repository that you can push to GitHub to host your site.
Once you've initialized a Git repository, you can add this repository to GitHub. I recommend using GitHub Desktop unless you're comfortable using Git via the command line. Use Add an existing repository to add your site as a repo, select all the files, and commit to master. Then push.
Once your site has been added to your remote repository, you can create an account on Netlify or Vercel. Connect their service to the repo for your site; it should automatically default to Eleventy's build commands. Once your site builds, it'll give you a randomly-generated URL. You can defer to each company's docs for adding a custom domain to your site:
Updating your site
After you make changes to your site, push them to master via GitHub Desktop (or the command line). This will automatically kick off a build on Netlify or Vercel, which usually takes ~30-60 seconds.
Next steps
Now that you've set up a basic site, you can move onto styling and assembling its basic components. Here are a few ideas:
-
You could also create an
imagesfolder in your root directory where you can drop in the pictures for your posts. Then, you can reference them in Markdown like}. -
Eleventy's dates might not be accurate, but I have an article on how to fix it.
-
You could create a
pagesfolder in your root directory where you can add pages — for instance,about.md. You can create a folder-specific default file (pages.json) to provide some defaults for these pages. -
You could add your own sitemap, which provides SEO benefits. I have an article on how to do this here.
-
You could also improve your file organization by creating a folder inside
_includescalledlayouts, and making layouts that inherit from each other. For instance, you could create a post.liquid layout that inherits from base.liquid:--- layout: layouts/base.liquid --- <article> <h1>{{ title }}</h1> {{ content }} </article>
These are just a few of the things you can do. Eleventy is flexible, so you can arrange your blog to fit your work style. Take your time in planning it out, and have fun with it!